After our final bottling of the 2006 vintage at
Three Fox, there was much cleaning of tanks and re-arranging of the winery that had to occur. Since our indoor temperature-controlled space is pretty limited, we had moved several (empty) stainless steel fermentation tanks outside to make room for the oak barrels that we aged the red wines in. Now that those barrels, too, were empty after bottling, we had to reverse the process, cleaning out the oak barrels with
soda ash and moving the stainless steel tanks back inside.
Easing into the 2007 Vintage
The first harvest to come in was a small batch of 800+ lbs (not quite half a ton) of Chardonnay. Grapes come in to the winery in small, sturdy plastic containers called "lugs". Each lug holds approximately 30 pounds of freshly harvested grapes. (I have since determined that lug is a very appropriate term, as you spend a considerable amount of time and effort lugging them around!) Lugs are filled to just below the top of the container such that when they are stacked, none of the grapes get squished by the container above it.
Whole Cluster PressFor this small of a batch of grapes (~800 lbs), we have to use a small 1/4 ton press as there isn't enough mass to sufficiently fill our (much nicer, faster and exceeding less messy) 3 ton rotating bladder press (I'll show you this bad boy in subsequent posts). The "technique" we used for this Chardonnay was "whole cluster press", meaning the entire grape cluster (grapes, stems and all) are all dumped into the the press. An alternate method sometimes employed for whites is to send them through a
destemmer first, to gently jiggle all of the grapes from the stems, and then only the grapes are pressed. Or, you may send the grapes through a crusher/
destemmer, where the grapes are first
destemmed, then crushed - breaking the skins and allowing the juice to flow freely out of them - before being pumped into a wine press. This last method is the one we used for our
Viognier and
Pinot Grigio, and I'll describe it in a later post.

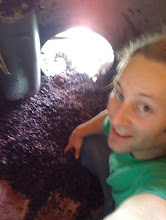
So, here's a picture of the small 1/4 ton wine press we used for the Chardonnay. Grapes are simply dumped into the top of the press, which has a large bladder in the center of it. It's a bit tricky to see the actual press in this picture as it's been wrapped in plastic, but the wine press is made of wooden slats with a small space between each slat. These had been soaked in water for a day or two prior to use so that the wood has absorbed some water and swollen in size, pressing close together. Typically, you line the inside of the press with a mesh screen, which prevents grapes and seeds and things from squishing through the wooden slats, clogging them up and making a mess. We did not have such a screen available, so wrapped the outside in plastic to catch the "burps" of grape skins and seeds that would occasionally squirt out during press.

In the center of the press a large rubber bladder which will eventually be filled with water (this is a hydraulic press - our larger press is pneumatic and uses compressed air which is much faster). As the bladder expands, the grape clusters are pressed against the wooden slats, breaking them open and forcing the juice from the grapes. The juice runs down to the bottom of the press, where it is collected in a clean bucket. We then carried the bucket to a stainless steel fermentation tank, and carefully poured it in. Voila - we're ready to start making wine! And the only thing we need to do that is some yeast.
FermentationSince we want to end up with wine and not grape juice, we employ yeast to convert the sugar in the grapes into alcohol in the process of
fermentation. Yeast occurs naturally in the environment, and there are generally several strains of yeast living on the grape skins, in the winery, everywhere. It is possible (even likely) that if we did nothing at this point, our grape juice would start fermenting naturally from the "wild" yeasts of the vineyard. However, each strain of yeast has its own characteristics and ferments in a slightly different way, some proceeding faster or slower, some producing hydrogen sulfide or other unpleasantness, having different alcohol tolerances, etc etc. Thus most winemakers like to stick with a known variable and add in a specific strain of yeast rather than take a gamble and see what happens to develop.
There are numerous strains of yeast commercially available to pick from. The type of yeast we used for this Chardonnay is called
Lavlin #D47, which is especially recommended for white varieties. Much like the yeast you might buy from the grocery store for baking, D47 comes in packets in a powdered form. To determine how much D47 to add, we multiply the volume of grape juice in gallons by 0.75, and the result is the number of grams of yeast to add. The yeast is not added directly into the stainless steel tank however - you must first "wake up" the yeast from their powdered dormancy. To do this, we filled a bucket with a couple of gallons of the pressed juice, then added the entire amount of yeast for the whole batch into the bucket. We stirred this up, then let it sit for about 30 minutes.
When we returned, the brew was bubbling nicely (the result of the yeast releasing carbon dioxide) and the smell you would normally attribute to baking bread was in the air. Thus we knew our yeast had taken off and were happily munching on the grape sugars, so at this point we are safe to pour the bucket of yeast into the tank full of waiting juice. And that is largely the end of the story for this Chardonnay for several weeks, until the fermentation has concluded (i.e., all of the sugar has been converted to alcohol, resulting in a "dry" wine and killing off the yeast for lack of food) and we start racking the wine from tank to tank to remove the sediment ("lees"). More on that process in a later post. Next up:
Viognier and
Pinot Grigio!
 To understand the decision of when to harvest, you need to know a little bit about how grapes grow and ripen. From the perspective of a winemaker, grapes go through two phases: an initial growth phase, during which time the berry size steadily increases, and a following ripening phase during which berry growth slows, sugar levels start increasing and acidity starts dropping (pH increases) [Ignore the anthocyanin in the cool cool graph I stole from the Texas Cooperative Extension page]. The transition between these two phases is called veraison - this is a French term which means "change of color of the grape berries". The berries start softening, and their color starts changing from fresh growth green to the color appropriate for their varietal (i.e., "red wine grapes" start getting reddish purple, "white wine grapes" start getting yellow-gold). Shortly after veraison is when you want to start taking readings of the sugar levels in the grapes to gauge how the ripening process is progressing.
 Sugars levels in a liquid is measured in brix. The unit of measure- ment for brix is "degrees", so when you take a brix reading of the grapes, you'll record a result of something like "19.5 degrees brix". To take a brix reading of the grapes, you first walk around each "block" of vines (Three Fox "blocks" are 30 rows long) in the vineyard, and take a random sampling of 15 or so grapes. This random sample should include grapes from the beginning, middle and end of the vines, as well as from both of the East and West facing sides of the vines (Three Fox rows are oriented N-S). You then allow the grapes to rest a bit, and cool down to 65 degrees F or so (winery temps). Then you mash them up and use a refractometer (or fancier instrument, but a refractometer gives you a precise enough reading at this point) to measure the brix by placing a couple drops of the juice on the plate and looking through the viewer and taking your reading.